Assault on Quabus
Table des Matières
- Arrival
- General Features
- Ceilings, Walls, and Floors
- Doors
- Enchantments
- Lights
- Sounds and Smells
- Transmutation Energy
- Random Encounters
- Keyed Locations
- 1 - Entry Hall
- Black Pudding
- Dambudzo's Secret
- 2 - Student Barracks
- Mutated Students
- Treasure
- 3 - Student Commons
- 4 - Kitchen
- Encounter: Mutated Student
- 5 - Meditation Chamber
- 6 - Room of Stones
- Encounter: Fake Pedestals
- Dragon Key
- Treasure
- 7 - Dragon's Head
- Trap: Concealed Pit
- 8 - Auditorium
- Encounter: Instructor Galabos
- 9 - Study Room
- Treasure
- 10 - Study Room
- Encounter: Undead Students
- 11 - Laboratory
- Hazard: Caustic Substance
- 12 - Instructor Galabos' Office
- Treasure
- 13 - Instructors Lounge
- Encounter: Rats of Unusual Size
- Secret Trapdoor
- Encounter: Webs and Spiders
- 14 - Summoning Room
- Encounter: The Orb
- Secret Trapdoor
- 15 - Antechamber
- 15A - Lounge
- 15B - Pit Trap
- Encounter: Air Elemental Guardian
- 16 - Guest Room
- 17 - Guest Room
- Treasure
- 18 - Guest Presenter's Hall
- Encounter: Bat Creatures
- Treasure
- 19 - Hall of Pillars
- Encounter: Soselva and Her Spiders
- Treasure
- 20 - Gymnasium
- Secret Door
- 21 - Pool
- Encounter: Mutated Students
- Treasure
- 22 - Lockers
- Treasure
- 23 - Sauna
- Encounter: Mephits
- 24 - Grimlock Lairs
- 24A - Ballroom
- 24B - Western Hall
- 24C - Southern Hall
- 25 - South Halls
- 26 - Dambudzo's Presentation Hall
- Secret Door
- 27 - Lower Hall
- Encounter: Grimlocks
- Trapped Door
- Treasure
- 28 - Lounge
- 29 - Guard Room
- Treasure
- 30 - Dambudzo's Laboratory
- Encounter: Dambudzo
- Treasure and Trap
- 31 - Dambudzo's Chambers
- Treasure
- 32 - Alchemist's Laboratory
- 33 - The Landing
- Iron Spider
- 34 - Further into Quabus
- Wrap-up: The Necrostone
- Adventure Hook Resolution
- A Vision Of Doom
- Maps Of Quabus
- Bring Back the Necrostone
Assault on Quabus
Into Quabus
This adventure is the second part of four in the Into Quabus adventure path which takes characters from 3rd level to 6th level.
Part 1. Danger at Blire Manor. A gang of mercenaries draws attention to itself when it starts operating out of Old Blire Manor.
Part 2. Prisoners of Quabus. In the old dragon dungeon Quabus, villains take part in the sale of humans for food.
Part 3. Secrets of the Dungeon Quabus. Deeper into the old dragon dungeon Quabus, a great evil stirs.
Part 4. Assault on Dungeon Quabus. A war is brewing in the dragon dungeon Quabus.
Credits
This adventure was a collaborative effort brought to you by these awesome folks:
Producers: The DMDave Team
Story and Mechanics: DMDave
Proofing: Benjamin "Sarge" Gilyot
Cover Illustrator: Shutterstock
Cartography: Tim Hartin
Interior Illustrations: Paper Forge and Shutterstock
Additional Support: The DMDave Team
Special Thanks: A big thanks to our friends at Wizards of the Coast for making the coolest game in the world and allowing creators like ourselves to borrow your open license.
How To Run This Adventure
To properly run this adventure, you need the Fifth Edition core rulebooks.
Text that appears in a box like this is meant to be read aloud or paraphrased for the players when their character first arrive at a location or under a specific circumstance, as described in the text.
The core 5e monster book contains stat blocks for most of the creatures found in this adventure. When a creature's name appears in bold type, that's a visual cue pointing you to its stat block in the core monster book. If the monster is not included in the core monster book, text in parenthesis point to the monster's source.
Spells and equipment mentioned in the adventure are described in the core player's rulebook. Magic items are described in the core GM's guide.
Abbreviations
The following abbreviations are used throughout this adventure:
hp | hit points | LG | Lawful good |
AC | Armor Class | CG | Chaotic good |
DC | Difficulty Class | NG | Neutral good |
XP | experience points | LN | Lawful neutral |
pp | platinum piece(s) | N | Neutral |
gp | gold piece(s) | CN | Chaotic neutral |
ep | electrum piece(s) | LE | Lawful evil |
sp | silver piece(s) | NE | Chaotic evil |
cp | copper piece(s) | NE | Neutral evil |
NPC | nonplayer character |
Adventure Primer
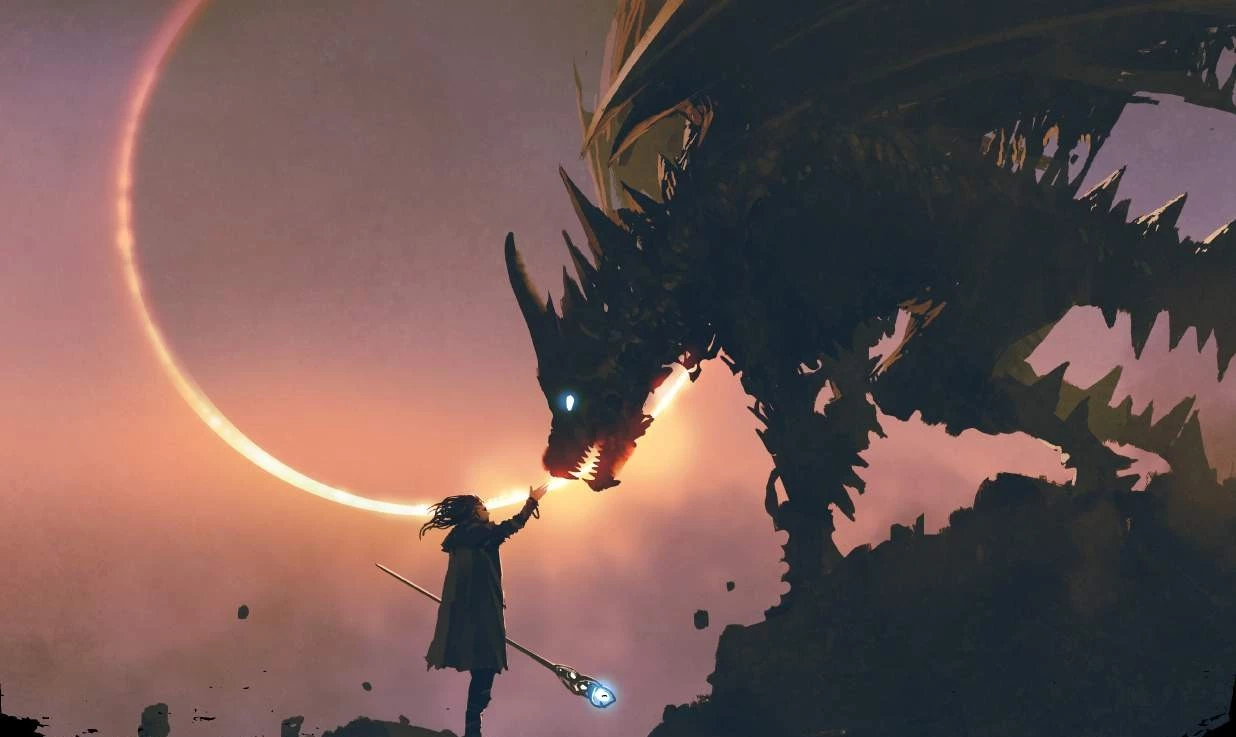
Assault on Quabus is a Fifth Edition adventure for three to seven 5th- to 7th-level characters. The adventure is optimized for five characters with an average party level (APL) of 5. Characters who completely clear the level should reach 6th level by its conclusion (if not 7th) The adventure takes place in the campaign world of Omeria in The Summer Land region. This adventure is the fourth part of the Into Quabus series and a direct follow-up to Secrets of Quabus. However, you can easily make this a solitary level for your 5th-level characters to visit.
Background
The ancient red dragon Tostrasz the Enormous' youngest wyrm, Defroksanz, was gifted the dungeon Quabus on his 100th hatching day. For Great Chromatics, a dungeon is a rite of passage. And Defroksanz made sure to make Quabus one of the most formidable dungeons in all of Omeria. The first level of Quabus was its prison. Defroksanz's minions would capture commoners across The Summer Land and inter them there. Next, came the death trap second level, Violent Delights. Defroksanz and his associates would watch their prisoners try to escape the deadly obstacle course, watching them on viewing screens. Finally, the third level acted as Defroksanz's research and development center. There, the dragon expended its sorcerous energies to unlock the mysteries of the Cosmos.
Following Defroksanz's defeat during the War of the Burning Plains, Quabus sat unmanaged for decades. The dungeon was rediscovered by one of Defroksanz's descendants, Skuvan the Firesoul Skuvan cleared a path to the old scrying temple on Violent Delights. However, neither he nor any of his minions dared go below the second layer.
The research labs are overrun with all sorts of dangers. Within its dark halls live bizarre aberrations, berserk constructs, conjured fiends, and creatures from The Low who've staked a claim in Quabus.
Of course, the real danger of this layer of Quabus is the rumored presence of Defroksanz's phylactery, a large diamond named The Necrostone. The spirit of the dungeon's former owner now searches the ruins of his old laboratories for a way to return to life through lichdom. If successful, Defroksanz will certainly bring doom on The Summer Land and potentially all of Omeria.
Adventure Hooks
The following plot hooks present some ways in which the characters can get involved in this adventure.
Into Quabus
If the characters already made it through the first three parts of the Into Quabus series, then this is the fourth and final part (of this cycle). The entrance to the third level is located in area 31 of Violent Delights.
A Vision of Doom
One of the characters experiences a dream. In the dream, a two-headed mantis warns the character that the dragon, Defroksanz, will soon revive itself. If this happens, it could spell doom for all of northern Omeria. The two-headed mantis gives the character directions to find the dragon's old dungeon Quabus.
Maps of Quabus
A scholar, Keshud Bosteid wants a detailed map of the third level of the dragon dungeon Quabus. He offers a 3,000 gp reward to anyone that can fulfill this request. If the characters haven't worked with Bosteid before, he explains that the dungeon can be found below the ruins of Old Blire Manor.
Bring Back the Necrostone
The historian and artifact collector, Qiu Xiang (LE male dragonborn knight) seeks a powerful artifact called The Necrostone. He believes it can be found on the third level of the dungeon Quabus located below Old Blire Manor. He's willing to pay up to 5,000 gp if the characters retrieve the stone and bring it to him.
Research Level
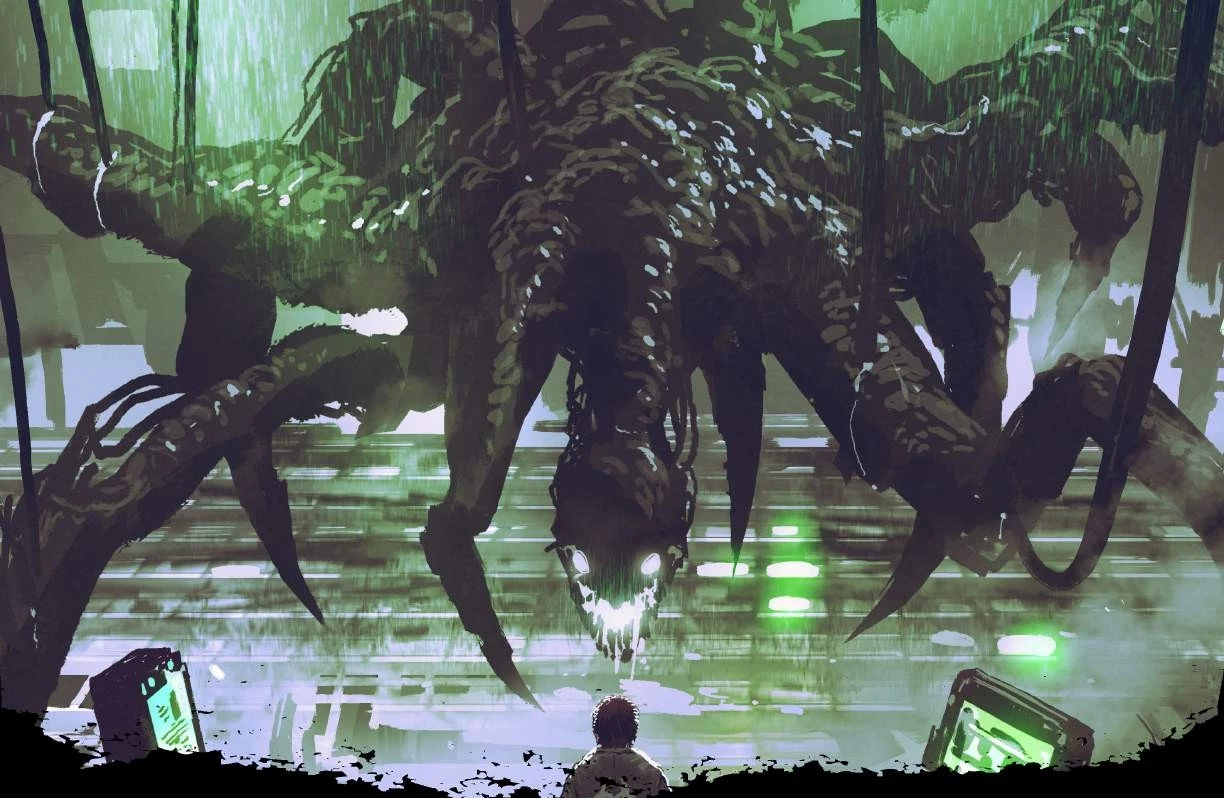
Beyond the prison and Violent Delights lie Defroksanz's laboratories and research rooms. The Great Chromatics, unhindered by the arcane laws of The Summer Land, applied the dark arts of conjuration, transmutation, and black necromancy to create new, fantastic horrors with which they could torment humanoidkind.
The research level was managed by an Aspaethan Transmuter named Dambudzo. Dambudzo was obsessed with Loikiel, the Archtransmuter Conquerer who nearly destroyed all of Omeria in the 7th century. Having fled her homeland after being chased away by the witchhunters, she was kidnapped by Defroksanz and his minions. Proving her worth, she convinced the dragon to give her a position as a researcher. After a year of impressive service, Defroksanz promoted Dambudzo to the director of arcane research and expanded Quabus so she could expand her studies.
When Quabus fell into disarray following the death of Defroksanz, Dambudzo sealed herself in her chambers and drank a potion of her own design to turn her into an immortal creature. The potion gave her eternal life, but it also changed her into a frightful monster. Plus, the transformation drove her insane. Years later, she continues to thrive in the dark, developing aberrations worthy of Loikiel himself. She employs a host of grimlocks who worship her like a god.
Arrival
If the characters played through the first two chapters of Into Quabus, likely they discovered the staircase that leads down to the research level via area 31 in Violent Delights. However, if this is the characters' first experience with the Into Quabus adventure path, you can have them circumvent the first two layers and explain that the stairs below Old Blire Manor lead directly into the research level.
General Features
Unless stated otherwise, the research level of Quabus has the following features.
Ceilings, Walls, and Floors
Quabus' chambers were hewn from the stone and loose earth below the region where Old Blire Manor now stands. The walls, floors, and ceilings were then dressed with limestone bricks. The ceilings are 10 feet high in passages and 15-feet high in chambers and braced with timbers. Doorways are 7-feet high and 4-feet wide to allow for the dungeon's larger patrons to pass through unhindered Thanks to frequent earthquakes in the region, cracks in the ceilings, floors, and walls are common.
Doors
All of the dungeon's doors are made from solid oak and hung on iron hinges (AC 15, 25 hp, immunity to poison and psychic damage) At the center of each door is a small window that allows creatures to view whatever is on the other side of the door. Most of the doors can be locked A locked door can be broken open by a character who uses their action to make a successful DC 17 Strength check. Or a character can use his or her action to make a DC 15 Dexterity check using proficiency in thieves' tools to pick the lock.
Enchantments
Like many of the Great Chromatic's secret lairs, all of the dungeon's manmade chambers and passageways are protected from magic that would allow intruders to enter. Any spell that would allow a creature to enter or leave the dungeon or transport itself from one level to another such as astral projection, plane shift, teleport, or word of recall fail. Similarly, effects that banish creatures to another plane of existence do not work. These restrictions apply to magic items and artifacts as well However, spells that allow movement between The Ethereal such as the etherealness spell still work. Conjuration spells and other magical effects that summon creatures into the dungeon still function, as does magic that utilizes extradimensional space such as magnificent mansion or bags of holding. However, spells cast within those spaces are subjected to the same restrictions as the rest of the dungeon. Finally, the dungeon, its contents, and any creature currently inside the dungeon cannot be detected by divination spells or magical effects used outside the dungeon. Spells such as locate object or scrying simply fail. The same goes for magic items that duplicate those effects or innate tracking features such as an invisible stalker's Faultless Tracker feature. However, all of these effects work so long as both the caster/user and target are inside the dungeon.
Lights
The research level has torches hung throughout, but very few are lit. The boxed text descriptions assume that the characters have darkvision or their own sources of light.
Sounds and Smells
Random sounds and peculiar smells are common occurrences on this level of Quabus. Screeches from strange things hiding in the dark might happen at any time, regardless of the presence of a creature. Smells range from sweet and enticing to horrible and vomit-inducing.
Transmutation Energy
Like wild yeast, rogue transmutation energy permeates this level of Quabus. Each character must succeed on a Constitution saving throw at the end of each hour they spend on this level or gain one level of exhaustion. The DC is 5 for the first hour and increases by 1 for each additional hour--this includes resting. If the characters use magical protection while resting, such as that offered by the tiny hut or magnificent mansion spells, they do not have to make the saving throw. Resting in this way or leaving the level for at least 1 hour or more resets the DC to 5.
If a character reaches 6 levels of exhaustion, it dies and instantly transforms into a gibbering mouther. The transformation of the body can be undone only by a wish spell.
Random Encounters
The third level is filled with all sorts of horrors lurking in the dark waiting for unsuspecting creatures to stumble into their paths.
Every 10 minutes that the characters spend roaming through this layer, roll a d20. On a result of 19-20, a random encounter happens. Choose a random encounter or roll randomly using the Research Level Random Encounter table below to determine the nature of the encounter.
| d6 | Encounter |
|---|---|
1 | 1d8 death dog |
2 | 2d6 giant rat |
3 | 1d6+1 giant spider |
4 | |
5 | 2d6 grimlock |
6 |
Keyed Locations
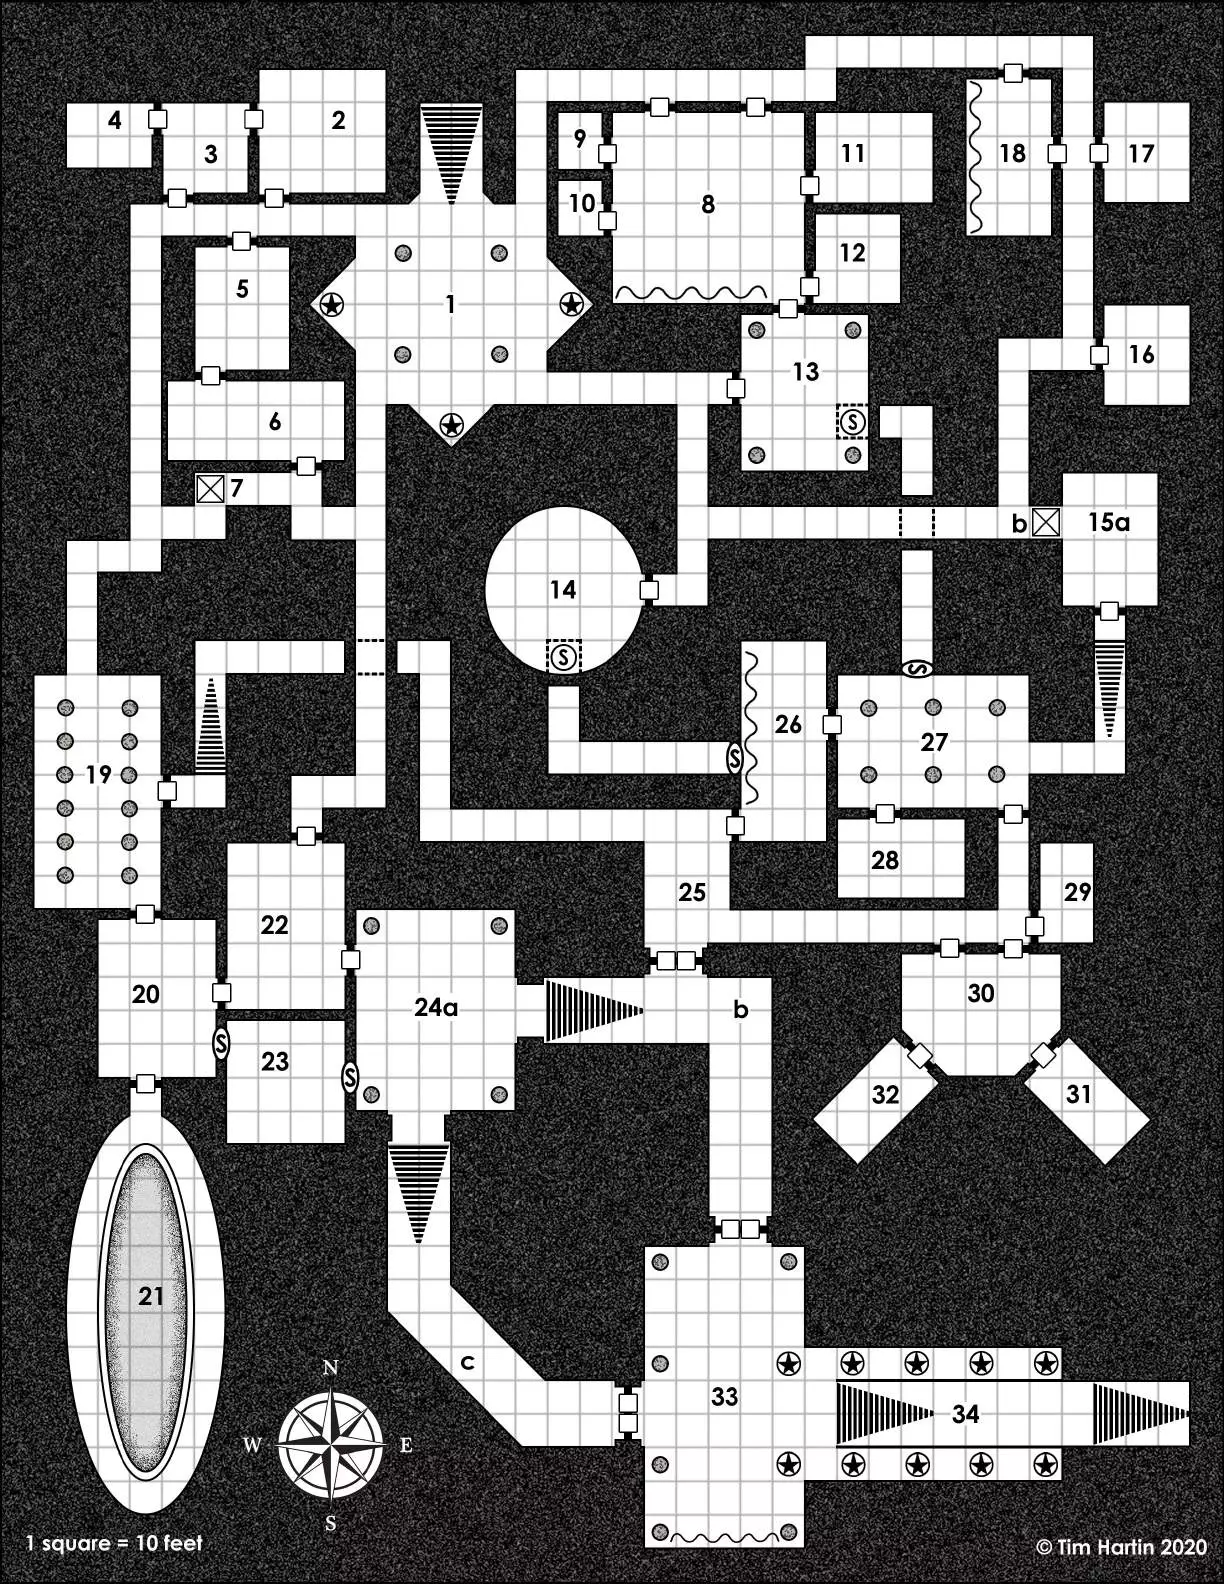
The following locations are keyed to the map of the Research Level of Quabus[...].
1 - Entry Hall
When the characters first enter this area from the staircase leading back to the second level, read or paraphrase the following:
The stairs deposit you into a colossal, diamond-shaped room measuring 60-feet on each of its sides. Four columns hold the 80-foot high ceilings aloft. At the center of each wall, four passages break away from the room, each one headed toward one of the cardinal directions. At the diamond's three corners that don't bear the staircase upon which you just descended stand four tall statues. The southernmost statue is carved to look like a red dragon, its fangs bared. The westernmost statue looks like a beautiful woman wearing long, flowing robes, her arms cross in front of her chest. And the easternmost statue looks like a dragonborn man reading from a scroll.
The three statues depict Defroksanz (south), Dambudzo (west), and The Master (east).
Black Pudding
A single black pudding hides behind the statue of the man reading from the open scroll When a character comes within 5 feet of the statue, the ooze attacks.
Dambudzo's Secret
If a character searches the statue of Dambudzo and succeeds ona DC 15 Wisdom (Perception) check, they discover a hidden compartment in the pedestal upon which she stands. The compartment contains a key that opens the secret trapdoors in areas x and x.
2 - Student Barracks
This large square room is 40-feet on a side with two doors to the west and south. There are 14 beds in the room, each with a locker at its foot.
Mutated Students
The moment the characters enter the room, they are subjected to the babbling of three gibbering mouthers. All three of the aberrations were once students of Dambudzo until the rogue transmutation energy in the complex forever altered them. Insane, they attack any living creature they find.
Treasure
The 14 footlockers all contain extra robes and commoner's clothes. There are also 6 spell scrolls spread randomly throughout the lockers. The scrolls have the following spells: darkvision, expeditious retreat, feather fall, fly, longstrider, and rope trick.
3 - Student Commons
There are two dust-covered stone tables in this room both flanked by benches.
This was where the students gathered. There's nothing of value here.
4 - Kitchen
This looks like it was once a kitchen. There's a hearth in the northwestern corner, counters for food preparation, and shelves cluttered with pots, pans, and other cooking implements.
Encounter: Mutated Student
A small, nobby creature covered in open sores digs through the remains of this area searching for food. It finally discovers arat and gnaws off its head. The creature was once a student, but was changed by the errant magic that pervades this level. Treat the mutated student as a quasit, but with the following changes:
Its creature type is aberration.
It understands Common, but otherwise can't speak.
It can't change shape or turn invisible.
The student isn't interested in fighting or interacting with the characters. It tries to hide or flee.
5 - Meditation Chamber
This large room measures 30 feet wide and 40 feet long.
Six motionless, mummified corpses sit cross-legged on moldy cushions throughout the room. They all face a mural on the eastern wall. The mural depicts a bald man in red robes with alabaster white skin and red eyes. He is surrounded by three-eyed toad creatures.
The corpses are harmless.
A successful DC 13 Intelligence (History) check reveals that the mural depicts Loikiel the Archtransmuter, a villainous mage who vanished from the face of Casar over 300 years ago. The toad creatures are his servants, the bufonem.
6 - Room of Stones
This long hall features eight pedestals placed against the walls. Atop each pedestal there is a different stone, each one a different color.
Encounter: Fake Pedestals
A detect magic spell reveals transmutation magic on the pedestals. All eight pedestals that hold the gems are mimics held in magical stasis. Ifa stone is touched or tampered with, the mimic upon which the stone sits springs to life and attacks.
Dragon Key
Hanging on the far eastern wall is a stone key shaped like a dragon. This key disables the dragon's head trap in 17.
Treasure
The eight stones are the Jaduee-Patr, the elements of creation[...]. All of the stones lack their energy and no longer function. Still, even in their dormant state, they are worth 100 gp each.
7 - Dragon's Head
When the characters approach this area from the west, read or paraphrase the following.:
The corridor continues east, and then turns south. At the wall just before the turn, there is a large dragon's head carved into the western wall. Its mouth is open. There appears to be a keyhole set into its mouth.
Trap: Concealed Pit
This 10-foot-by-10 foot section of hall is trapped with a concealed pit with a trap door. When a creature steps onto the trapdoor, the entire floor buckles and drops the creature 10 feet down into a pit. The creature takes 3 (1d6) damage from the fall Then, a 10-foot-cubed stone block slides from the wall directly west of the trap door and covers the pit. This has two effects. First, the creature inside of the pit cannot escape the pit until the block is removed. Second, the block prevents further passage through the hallway.
Countermeasures. The only way to move the stone block is to insert the dragon key from 6 into the stone dragon's mouth. If the characters don't have or lost the stone key, a character proficient in thieves' tools can make a successful DC 15 Dexterity check to disable the device. Once unlocked or disabled, the block slides back into its original position. After 1 hour, the trap resets.
8 - Auditorium
This large, well-lit chamber was once an auditorium. Six rows of six dust-covered school desks face the southern wall where a large, red curtain hangs from the 40-foot-high ceiling. A few feet in front of the curtains there is a large, wooden desk that faces the chairs.
There are seven exits in this area: two in the northern wall, one in the southern wall, two in the eastern wall, and two in the western wall.
Encounter: Instructor Galabos
Once a teacher working for Dambudzo, Galabos was warped by the magic of this level He now stands 16 feet tall and his face is a bulbous mess of oozing sores. The bodies of four of his old students have merged into his own; their faces and features are visible on his chest, back and shoulders. They moan incoherently.
Treat Galabos as a hill giant, except his type is aberration instead of giant. Instead of a great club, he uses his old desk as a weapon and throws the school desks as rocks (effectively the same). He also has the following feature:
Eject Student. When first encountered, Galabos' body contains 4 of his students. As a bonus action, Galabos releases one of the students which appears in an unoccupied space within 5 feet of him and acts immediately after him in initiative order. Treat the student as a zombie. The student acts as an ally of Galabos but isn't under his control.
9 - Study Room
This small room has a wooden table at its center. A withered skeleton sits at the south end of the table.
The corpse is harmless.
Treasure
The corpse is carrying a wand of secrets in its robes.
10 - Study Room
The small room has a wooden table at its center. There are two dried-out corpses wearing red robes seated at the table.
Encounter: Undead Students
Both of the corpses come to life whenever a living creature enters the room. Treat them both as mummies.
11 - Laboratory
This room looks like it was once a laboratory. The walls are wrapped with tables, each one covered in old alchemical equipment. There is an acrid smell coming from the easternmost table.
Hazard: Caustic Substance
A beaker of foul-smelling liquid spilled onto the northernmost table's surface, creating a puddle of brown liquid. Four potions sit in the liquid: potion of growth, potion of hill giant strength, potion of fire breath, and potion of climbing.
If a character touches one of the potions with his or her bare hands, they take 1d6 acid damage. Furthermore, if the potion is placed into a nonmagical container such as a leather, cloth, or canvas pouch, pocket, or bag, the substance on the outside of the container eats through the material and burns a hole in the container, likely ruining it. The potion then falls out of the container, potentially shattering on the floor.
Countermeasures. Pouring wine or anything else with high alcohol content neutralizes the acidic liquid, making the potions safe to pick up. A character with proficiency in alchemist's tools will automatically recognize this fact. Otherwise, a character must make a successful DC 10 Intelligence check to know this.
12 - Instructor Galabos' Office
This room looks like an office. There is a large desk at the north end of the room facing south with a bookshelf right behind it. In front of the desk are three chairs. A rotting couch rests against the southern wall.
Treasure
A quick search through Galabos' desk reveals his old spellbook. The spellbook contains all the spells a mage prepares.
13 - Instructors Lounge
This chamber boasts 30-foot high ceilings held aloft by four round columns. There are rotting couches and chairs spread throughout the area.
A large cabinet rests against the western wall, its doors open.
Encounter: Rats of Unusual Size
Four bigger-than-normal giant rats are hiding among the furniture in this room. Make the following changes:
The giant rats' sizes are Medium.
They have 18 (4d8) hit points each.
They have Strength scores of 12 (+1)
The giant rats deal 1d6 + 2 piercing damage with their bite attack.
They are aggressive and attack the characters on sight.
Secret Trapdoor
The cabinet against the western wall is empty and it's attached to the floor. There is a false bottom built into the cabinet that acts as a trapdoor. The trapdoor is locked; one of the wooden slats slides away revealing the keyhole. The key found in the statue of Dambudzo in 1 unlocks the trapdoor. Without the key, a character with proficiency in thieves' tools can pick the lock with a successful DC 13 Dexterity check. A character with a crowbar or similar lever can break open the trap door with a successful DC 15 Strength check. The trapdoor hides a ladder that leads into an old, web-covered corridor that leads to 27.
The trapdoor can be opened from its underside without a key.
Encounter: Webs and Spiders
The secret corridor connecting this area and 27 has a 20-foot long by 10-foot wide area of thick webs near its center. A creature entering the webbed area for the first time on a turn or starting its turn there must succeed on a DC 12 Dexterity saving throw or become restrained by the webs. A restrained creature can use its action to try to escape, doing so with a successful DC 12 Strength (Athletics) or Dexterity (Acrobatics) check.
Each 10-foot cube of giant webs has AC 10, 15 hit points, vulnerability to fire, and immunity to bludgeoning, piercing, and psychic damage.
There are four giant wolf spiders who hide in the corridor, just beyond the webs. They wait for creatures to get stuck in their webs then attack.
14 - Summoning Room
This rotunda is 60-feet in diameter with 90-foot high ceilings. The floor is decorated with arcane symbols.
There is a large, glowing white orb floating 10 feet off the ground at the center of the room.
This room emits strong abjuration magic, detectable by a detect magic spell. Similarly, casting detect evil and good reveals a strong presence of fiendish evil that comes from the floating orb.
Encounter: The Orb
The orb houses a barbed devil's mind A humanoid that touches the orb must make a DC 13 Charisma saving throw or become possessed by the barbed devil that is imprisoned in the orb. The target is incapacitated and loses control of its body. The barbed devil now controls the body and the target's mind is placed into the orb. The barbed devil can't be targeted by any attack, spell, or other effect, except ones that affect fiends, and it retains its alignment, Intelligence, Wisdom, and Charisma. It otherwise uses the possessed target's statistics, but doesn't gain access to the target's knowledge, class features, or proficiencies.
The possession lasts until the body drops to 0 hit points, the barbed devil ends it as a bonus action, or the barbed devil is turned or forced out by an effect like the dispel evil and good spell.
When the possession ends, the barbed devil returns to the orb so long as the orb is on the same plane of existence, and the target's mind returns to its body. If the orb has been destroyed or is on another plane of existence, both the barbed devil and the host's mind are destroyed; the host's mind can only be returned with a wish spell when this happens.
The target is immune to the barbed devil's possession for 24 hours after succeeding on the saving throw or after the possession ends.
The orb can be destroyed It has AC 15, 10 hp, and immunity to poison and psychic damage. If the orb is destroyed, any creature whose mind is currently housed within it is destroyed as well.
Secret Trapdoor
If a character succeeds on a DC 20 Wisdom (Perception) check, they discover a small keyhole set into the floor's tiles. Placing the key found on Dambudzo's statue in 1 into the keyhole unlocks a secret trapdoor and ladder. The ladder leads down into a secret corridor that connects to 26.
The trapdoor can be opened from its underside without a key.
15 - Antechamber
This level of the dungeon is divided into two distinct sections. The uppermost section of the level was intended for students and Dambudzo's disciples. The lower section was where Dambudzo and her colleagues actually worked. This antechamber guards the direct passage to the lower levels.
15A - Lounge
Judging by the cobweb-covered couches and chairs that clutter this room, this was probably once a lounge.
Trapped Door. The southern door that leads to 27 is magically trapped. A successful DC 15 Intelligence (Investigation) check reveals the presence of a subtle arcane glyph. If a Medium or smaller creature tries to pass through the door without speaking the phrase "Loikiel" first the target must succeed on a DC 15 Constitution saving throw. On a failed saving throw, the target's size is reduced to 1/10th its normal height and 1/1000th its normal weight. This reduction decreases its size to Tiny. Until the effect ends, the target's Strength score is 2 unless it is already lower and its movement speed is reduced to 5 feet unless it is already less. The target's weapons also shrink to match its new size. While these weapons are reduced, the target's attacks with them deal only 1 point of damage and do not add nor subtract the target's Strength modifier.
The effect lasts until the target completes a long rest or until a greater restoration spell or similar magic is cast on the target.
The glyph can be removed with a dispel magic spell Alternatively, it can be removed with a successful DC 18 Intelligence (Arcana) check. Failing the check by 5 or more 10 triggers the trap, targeting the character attempting to disarm it.
The trap only works from this side (see 27 for details).
15B - Pit Trap
The 10-foot-by-10 foot section of hall marked "b" on the map is trapped with a concealed pit with a trapdoor that swivels open to deposit victims, then closes, sealing them inside the pit. When a creature sets foot on one side of the pit or the other, they fall 10 feet into the pit and take 3 (1d6) damage from the fall. The trap's door then swivels to the opposite position, closes, and locks with its bottom side facing up.
Noticing the pit's trapdoor requires a successful DC 15 Wisdom (Perception) check.
Spikes. The cover's bottom side is covered in 1-inch tall, poison spikes. While the trap door is closed with its bottom side exposed, any creature who enters or starts their turn in the area takes 2d4 piercing damage for each square that they move through and must make a DC 10 Constitution saving throw. On a failed saving throw, the creature is poisoned. The poisoned effect lasts until the creature completes a long rest.
Locked. Once the trap door is in place with its bottom side up, it is locked A character proficient in thieves' tools can make a successful DC 13 Dexterity check to jimmy the lock. Or a character with a crowbar or similar lever can pry open the door with a successful DC 15 Strength check. Failing either check by 5 or more subjects the character to the spikes detailed above.
Ooze Companion. Unfortunately, the trap is the least of the victim's worries. There is a gray ooze at the bottom of the pit. Its False Appearance trait allows it to blend in with the walls of the pit, making it undetectable. It immediately attacks any living creature that falls into the pit.
Encounter: Air Elemental Guardian
When either of the traps protecting the ante-chamber are triggered, an air elemental is conjured into the center of area 15a. The air elemental attacks all intruders. If the phrase "Loikiel" is spoken aloud, the air elemental vanishes and returns to the plane from whence it came.
16 - Guest Room
This chamber boasts a four-post bed, dresser, desk, and tall, oak wardrobe.
Other than a few moldy robes in the wardrobe, there is nothing of value in this chamber.
17 - Guest Room
This old bedroom is covered in cobwebs.
There is a large bed against the north wall, a wardrobe to the south, and a desk to the east.
It appears that there is something still using the bed; there is a bulge under the sheets roughly in the shape of a six-foot-tall humanoid.
There is a withered corpse under the sheets, dead for more than fifty years. It's harmless.
Treasure
The corpse wears a golden signet ring worth 250 gp.
18 - Guest Presenter's Hall
Two rows of school desks face the western wall which is dressed with a large, red curtain. There is a podium facing the chairs.
This room has 30-foot high ceilings.
Encounter: Bat Creatures
Three of this level's old students were transformed by the errant transmutation magic into grotesque bat-like creatures. All six bat creatures use the giant bat stat block, except with the following changes, which makes them each CR 2 (450 XP):
A bat creature's type is monstrosity and its alignment is chaotic evil
It has an Intelligence score of 12 (+1).
Spellcasting. The bat creature is a 3rd-level spellcaster. Intelligence is its spellcasting ability (spell save DC 11, +3 to hit with spell attacks). It requires no somatic or material components to cast its spells. It has the following wizard spells prepared: Cantrip (at will)--fire bolt, mage hand, prestidigitation; 1st level (4 slots)--magic missile, shield, 2nd level (2 slots); flaming sphere, darkness
The bat creatures remain hidden until they are detected. At the start of combat, one of the bats casts darkness while the others attack with their ranged spells.
Treasure
The bats keep a sack of treasure that they've collected from other parts of the dungeon. The sack contains a spellbook with all the spells that the bat creatures prepared, 180 cp, 250 sp, and 90 gp.
19 - Hall of Pillars
The eastern door that leads to the corridor that connects this area and 25 is locked. The key is kept in Soselva's cocoon (see below).
Two rows with six pillars each hold up the 40-foot high ceilings of this large room. Both the pillars and walls' bas-reliefs are carved to look like great dragons.
A character who glances up at the ceiling notices that the ceiling is covered in thick webs.
Encounter: Soselva and Her Spiders
Soselva was another of Dambudzo's colleagues who was irrevocably changed by this level's magic. It turned Soselva into a spider-humanoid hybrid She uses the drider stat block except she speaks Common instead of Elvish and Undercommon, and she can cast all the spells that a mage can cast. When the characters first enter this chamber, she is hiding in the cobwebs on the ceiling with four giant wolf spiders. At the start of combat, she casts darkness on the characters, then sends the spiders into the dark who use the pillars to make hit and run attacks. Once the spiders are defeated, she enters the fray using her full array of spell attacks. If she is defeated before the spiders, the spiders retreat to the dark recesses of this chamber.
Treasure
Soselva keeps a cocoon with her treasures stuck to the ceiling. Ifa character reaches the cocoon, they will find 200 gp and a jeweled platinum scepter worth 500 gp. There is also a key that unlocks the door to the east.
20 - Gymnasium
This large area is filled with unusual looking implements and furniture. At one corner of the room, you see racks of heavy stones of various sizes, some of which have iron handles. Another section has odd-looking equipment for climbing on such as pairs of parallel bars, a six-foot high sawhorse with hand grips. There's also thick, knotted ropes that hang from the ceiling.
The floor is covered in thick, plush rugs.
This used to be this level's gymnasium. Most of the equipment is rusted or rotting.
Secret Door
There is a secret door hidden in the southwestern wall that leads to 23. Finding the door requires a successful DC 15 Wisdom (Perception) check.
21 - Pool
This oval-shaped room is dominated by a colossal oval-shaped pool at its center. The pool is 100-feet long and 30-feet wide and its widest point. The water inside looks murky and non- potable.
The pool is 10-feet deep at its deepest point.
Encounter: Mutated Students
There are seven mutated students hiding in the water. The students were changed into amphibious creatures by the level's radiant magic. Use the sahuagin stat block for each one, except that they speak Common instead of Sahuagin and they do not wield spears.
The students wait for creatures to lurk by the side of the pool, hiding in the dark, stagnant water. They then attack with intent to grapple and drag their victims into the water. Failing that, they lash out with claws and teeth.
Treasure
The students keep the valuables they've taken from creatures who've entered this area at the bottom of the pool in an old recreational net. Inside the net are goggles of night and three potions of healing.
22 - Lockers
The door leading to and from 24 is locked The key that unlocked the door is long lost.
This large room appears to be a room for disrobing. The walls are wrapped in shelves for storing belongings, and there are two freestanding rows of shelves that stand north-to-south at the center of the room. Between the rows of shelves are stone benches.
This room was once used for the students to disrobe and dress for the gymnasium and pool, areas x and x respectively.
Treasure
The party can spend 10 minutes searching through the shelves of this locker room. At the end of the 10 minutes, they discover 50 sp, 20 gp, a potion of greater healing, and a spellbook which contains the following spells: grease, floating disk, misty step, unseen servant, and web.
23 - Sauna
When someone first opens the door to this room, read the following:
Immediately, hot steam exits the door. Looking past the steam, you see a large room wrapped with knotty wooden boards and wooden benches. At the center of the room is a pit filled with large hunks of glowing coals.
This room is a sauna. The steam lightly obscures everything in the room, Also, it is under the effects of extreme heat, as described in the DMG.
Encounter: Mephits
Eight steam mephits hang out in this chamber. They once acted as the room's source of steam, but have grown accustomed to living in this strange level of the dungeon. Also, buried under the coals, is a magma mephit upon which the steam mephits frequently pour water, causing it agonizing pain. The magma mephit isn't strong enough to lift the coals off its body.
The mephits won't try to interact with the characters unless the characters attack first or try to free the magma mephit.
24 - Grimlock Lairs
This large series of halls connects Dambudzo's chambers with the rest of the lower sections. It is currently inhabited by grimlocks who've been driven mad by the ambient energy of this level. Other than that, the transmutation magic seems to have no other effect on them. The grimlocks are servants of Dambudzo and do her bidding.
24A - Ballroom
This large, dark chamber looks like it may have once been a ballroom. But now it lie in shambles. A large, glass chandelier lies at the center of the floor, smashed to pieces. Mounds of white animal feces lie in piles at regular spots around the room.
Grimlocks. Six grimlocks guard this area. They attack the characters on (blind) sight.
24B - Western Hall
Two grimlocks keep guard in the hall that leads west. They are mounted on strange, hairless wolves that lack eyes. Treat the wolves as dire wolves, except they have blindsight 30 ft. or 10 ft. while deafened (blind beyond this radius), they can't speak, and they have same Blind Senses as the grimlocks.
Arcane Locked Doors. The doors that lead to 33 are arcane locked. A DC 25 Strength (Athletics) check is required to break them down. If the characters are carrying Defroksanz's phylactery, they can pass through doors without any issue.
24C - Southern Hall
The grimlocks use this hall as their barracks. There are piles of torn rugs and furs strewn everywhere which the grimlocks use as beds. There are eight grimlocks sleeping here when the characters enter the area.
Treasure. Among the grimlocks' refuse, the characters will find 105 sp, 30 gp, and a bit of amber worth 100 gp.
Arcane Locked Doors. The doors that lead to 33 are arcane locked. A DC 25 Strength (Athletics) check is required to break them down. If the characters are carrying Defroksanz's phylactery, they can pass through doors without any issue.
25 - South Halls
Any loud noises in this area attracts the attention of the grimlocks in areas x and x.
Because of the grimlocks' heightened senses, they gain a +5 bonus to their passive Perception checks made to smell and hear.
26 - Dambudzo's Presentation Hall
This appears to be a classroom. A large curtain covers the western wall. Facing the curtain, there are two rows of school desks.
Secret Door
There is a secret door hidden behind the curtain, found so long as someone checks behind it. The secret door leads into the corridor that connects this area and 14.
27 - Lower Hall
Six pillars carved in the likeness of red dragons hoist the 30- foot ceilings of this magnificent hall. A glass chandelier lies in ruins at the center of the room.
Encounter: Grimlocks
Two grimlocks joined by a grimlock champion stand guard in this chamber. The grimlock champion uses the gladiator stat block except it has blindsight 30 ft. or 10 ft. while deafened (blind beyond this radius), he speaks Undercommon, and he has the same Blind Senses that the grimlocks do. The grimlock champion wields a spear of blinding light
Trapped Door
The characters can exit through the door leading to 15a without setting off the trap. However, once the door closes, the trap resets and functions as normal.
Treasure
The characters can take the spear of blinding light from the grimlock champion.
28 - Lounge
This old lounge is covered in cobwebs.
There is nothing of value here.
29 - Guard Room
At the north end of this dusty old room are a pair of bunk beds. Two weapon racks and a table with dust-covered playing cards are at the south end.
This room was once for the barracks for Dambudzo's personal guards. They've been dead for centuries (and managed to stay that way).
Treasure
A character who succeeds on a DC 15 Wisdom (Perception) check notices a stone out of place near the bunks. Behind the stone, there is an old, rotting leather pouch stuffed with 30 gp and a silver necklace worth 25 gp.
30 - Dambudzo's Laboratory
The door to this chamber is locked. Once the characters get past the door, read the following:
This huge, pentagonal room looks like it was once used as an auditorium. Rows of chairs all face the south wall. A tall podium faces the chairs. Behind the podium is a large wall of black slate. A creature with knobby red scales and leathery, mishapen wings hunches over the slate wall, writing on it with a piece of chalk. Each scrap of the chalk emits a earsplitting screech.
"Wrong! It's all wrong!" growls the creature. "It's always wrong!"
The ceilings in this area are 40-feet high.
Encounter: Dambudzo
The creature is Dambudzo. Thanks to a transformative potion, she has changed herself into a creature that's not quite human and not quite a dragon. The change has driven her completely insane. The characters may have a chance to parlay with her, but her mood swings violently from one round to the next. One moment she might offer assistance--or ask for it--the next she might attack. Ultimately, she is a tragic figure whose ambitions got the better of her.
Dambudzo uses the young red dragon stat block, except she can't fly, and in place of Fire Breath, she has the following feature:
Transmutation Breath (Recharge 5-6). Dambudzo emits a transformative gas in a 30-foot cone. Each creature in that area must make a DC 17 Constitution saving throw. A creature who fails its saving throw takes one level of exhaustion. If a character reaches 6 levels of exhaustion from this effect, it dies and instantly transforms into a gibbering mouther. The transformation of the body can be undone only by a wish spell
Treasure and Trap
Dambudzo's old spellbook is stuffed into the podium. The spellbook contains all the spells an archmage prepares up through 5th level She keeps it protected with a glyph of warding with explosive runes that emit thunder damage.
31 - Dambudzo's Chambers
This old bedroom is in complete disarray. The bed has been torn apart, its mattress tossed aside and shredded. Broken bits of furniture cover the floor. Torn clothing lies everywhere.
Treasure
Characters who search the wreckage will find Dambudzo's old wand of wonder.
32 - Alchemist's Laboratory
This room appears to be an alchemist's laboratory. Unlike the other areas in this lair, the majority of the surfaces are relatively free of dust. The tables and shelves are lined with clean beakers and vials. There are clean utensils laid out in neat patterns.
On a table at the furthest end of this chamber sits a large, yellowish-white gem that gives off dull yellow light.
The gem is none other than The Necrostone, Defroksanz's phylactery. When Defroksanz was destroyed (either during the War of the Burning Plains or when the characters killed him in the previous adventure), his soul returned to the stone. Before he could reform his body, Dambudzo trapped Defroksanz within his own phylactery with a strong abjuration spell (detectable with a detect magic spell). The spell can be removed by casting dispel magic against a 7th- level spell on the stone.
Defroksanz is able to speak through the stone. He immediately senses that the characters aren't Dambudzo and requests that they free him from the spell that holds him. Likely, the characters will refuse.
The phylactery has AC 20 and 25 hit points. It is immune to all nonmagical damage plus any poison and psychic damage.
Before the characters destroy the phylactery, Defroksanz issues a warning:
"If you destroy me, you'll never be able to stop him."
No amount of coercing or threats will cause Defroksanz to reveal who "him." is. Instead, he offers that if they take him to the south hall, he will show them "Quabus true purpose."
If Defroksanz's phylactery is destroyed, the dragon's soul is permanently destroyed along with it. Not even a wish spell will bring him back to life.
33 - The Landing
Both the doors that lead into this area are arcane locked. If the characters are in possession of Defroksanz's phylactery, they can pass through the doors without any trouble.
This huge hall looks like it hasn't been used in decades. Not only do dust and cobwebs cover the floor, but there are large gouges in the stone tiles as if a battle transpired here.
At the west end of the room, a 20-foot-wide staircase flanked by 10 draconic statues, 5 on each side of it, descends to a lower level of the dungeon. The room is lit by blue flame which burns from the mouths of the dragons.
The flames that come from the dragon's mouths are continual flame spells.
Iron Spider
At the center of the room stands a large mechanical spider. The spider guards the passage to the lower level. It won't attack unless someone attempts to go down the stairs. It will also avoid attacking the party if they are carrying Defroksanz's phylactery.
The spider uses a shield guardian stats, except that it has the following changes:
The iron spider has a climb speed of 30 ft.
The iron spider has the Spider Climb feature, which allows it to climb difficult surfaces, including upside down on ceilings, without needing to make an ability check.
The iron spider has the cloudkill spell stored in it.
The iron spider's fist attacks are claw attacks. The attacks deal slashing damage instead of bludgeoning damage, but are otherwise the same. It can use its multiattack to attack with its claws twice.
34 - Further into Quabus
This massive staircase goes deeper into Quabus. For now, you are free to add your own layers of Quabus. You can also look toward the sequel to this series, Further Into Quabus.
Wrap-up: The Necrostone
Once the characters come into possession of Defroksanz's phylactery, The Necrostone, they will be able to stop the red dragon from returning to The Real Of course, there are multiple parties who wish to control the phylactery, and not just Defroksanz's followers. Possessing such a dangerous relic will likely lead the characters on further adventures both in and outside Quabus.
Adventure Hook Resolution
There were three adventure hooks mentioned in the introduction. Here is the resolution for each adventure hook:
A Vision Of Doom
Once the characters locate Defroksanz's phlactery, the two- headed mantis returns in another dream. This time, it explains that finding The Necrostone was just the beginning. But the dragon's soul knows the location of an evil even more powerful than he; and it lies further into Quabus.
Maps Of Quabus
If the characters create detailed maps of the third level of the dragon dungeon Quabus, Keshud Bosteid pays the full 3,000 gp. However, if the maps show that a deeper, darker level lies beyond even the third, he'll offer an additional 5,000 gp if they go further into Quabus.
Bring Back the Necrostone
When the characters bring The Necrostone to Qiu Xiang, he pays them what he promised: 5,000 gp. However, if the characters reveal that the dungeon Quabus goes deeper than three levels, he challenges them to learn more about the secrets and artifacts that they might further into Quabus.
Maps
Tim Hartin's high resolution maps.